BigNum
Hot-swappable and Hand-wired Numpad/Macropad powered by RP2040 and QMK-VIAL
Project Description
Description
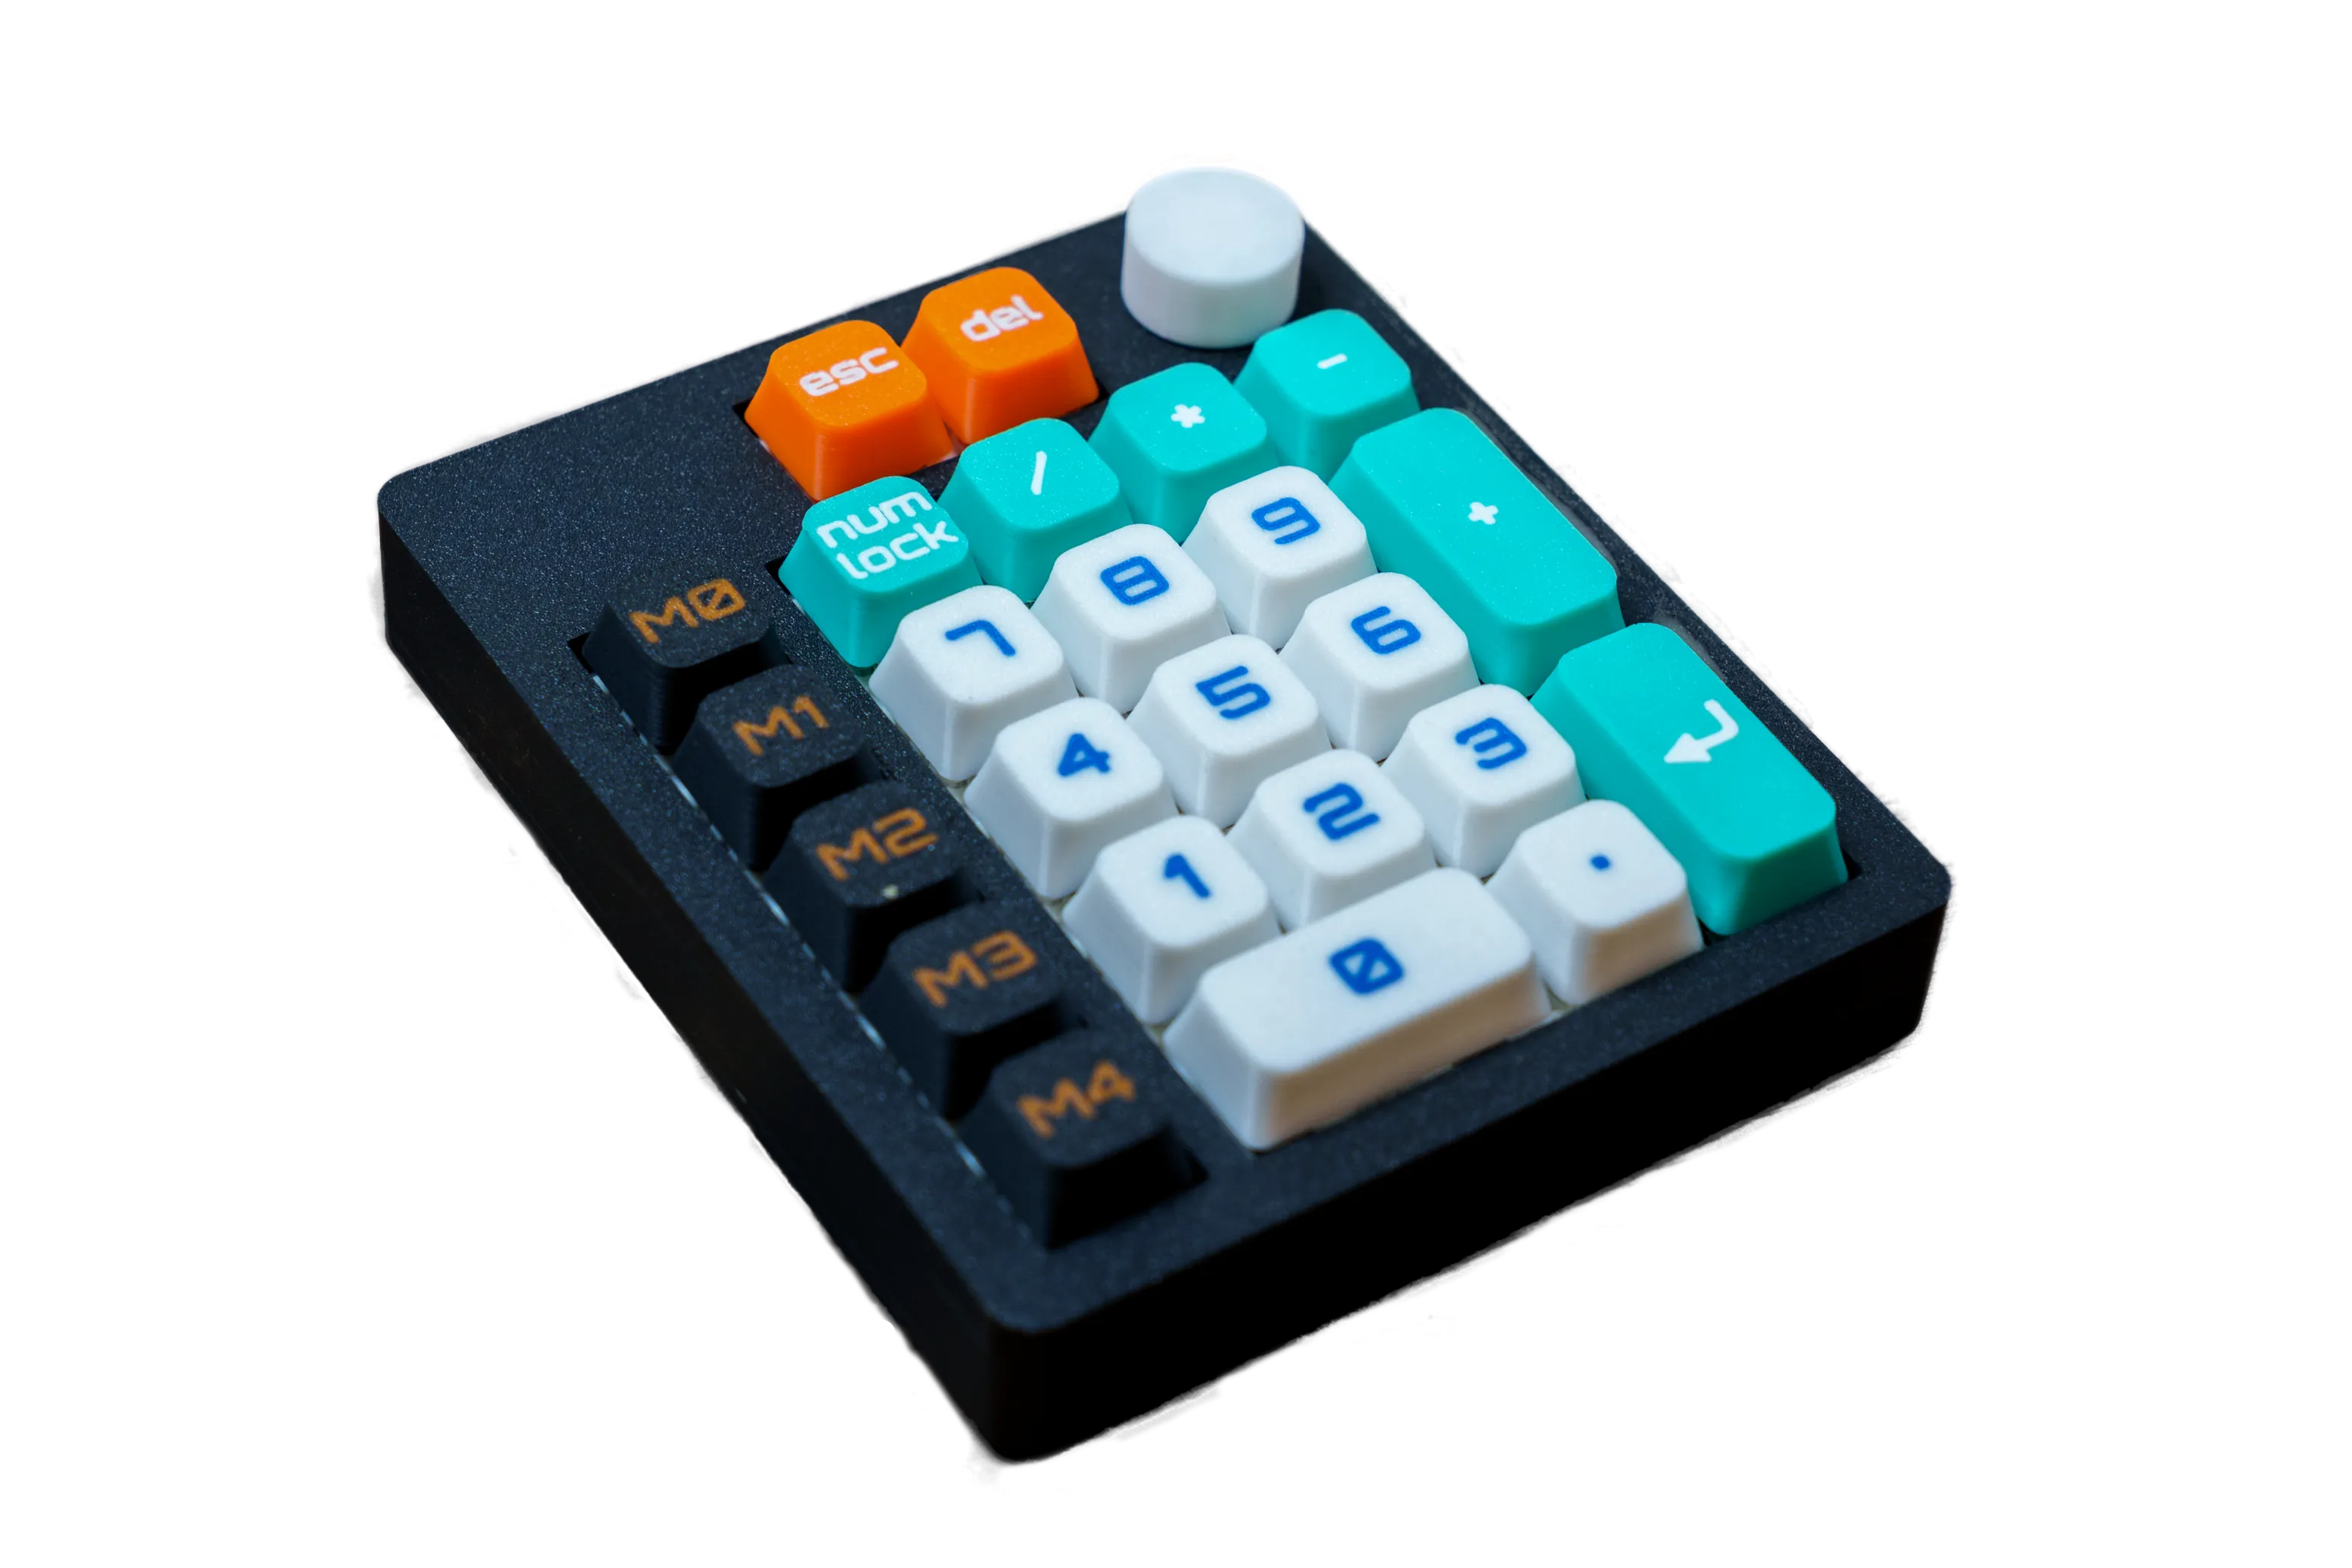
BigNum is a 3D-printed numpad/macropad designed for those who enjoy DIY projects and customizing their tools.
This project offers two versions: one with hotswap sockets, perfect for easily swapping out switches, and another with directly soldered switches for a more permanent build.
You can configure each key using Vial, a software that allows you to tailor the key functions to your needs.
Whether you're looking to create a simple numpad or a more complex macropad, BigNum can adapt to your preferences.
The project includes all necessary files for 3D printing and a detailed assembly guide to walk you through each step.
Features
- Two mounting options: hotswap or direct soldering
- Key customization with Vial
- 3MF files and assembly guide included
I highly recommend following the PDF guides in addition to the video. There is a guide available for each version of the BigNum.
- PDF for hotswap version
- PDF for handwired version
The following lists include everything you'll need to assemble the BigNum, with options for customization.
3D Printed Parts
- Case (2 versions)
- Switch plate (2 versions)
- Hotswap plate
- Back plate (2 versions)
- Feet (21mm and 17mm)
- RP2040 Zero container
- Keycaps set with markings and multicolor
- Blank keycaps set
- Encoder knob
Specifications
Layout
Electronics
Construction
Dimensions
Compatibility
Interactive Model
Build Tutorial
Project Images
Bill of Materials
Build Guide
Download Files & Guides
Get all 3D print files and both PDF guides (hotswap & handwired). Follow the PDF alongside this build.
Print & Prep the Case
3D-print the case and plates. Insert the M2 heated inserts using an insert press and trim excess plastic if needed.
Prepare the Microcontroller
Solder the pin headers to the RP2040 controller, then mount it in its case.
Install Hotswap Sockets & Diodes
Press all hotswap sockets into the plate. Cut copper wire to length, solder diodes to sockets with correct orientation (black band opposite the socket), then trim excess.
Assemble Plates & Rotary Encoder
Screw the hotswap plate to the switch plate with M2×10 mm screws. Install the EC11 rotary encoder and solder its diode.
Wire Columns & Connect to Controller
Lift socket pins, add heat-shrink where needed, solder column wires, then connect all rows, columns, and encoder pins to the microcontroller. Verify with a multimeter.
Finalize, Flash & Finish
Mount the assembly into the case, secure the back plate, install switches and stabilizers. Flash the bignum.uf2 firmware using Vial, test all keys, then install keycaps.